
Setup - Vanishing points and horizon
While it is quite enough to just draw straight lines and mark them with a dot to get a horizon and vanishing points, we will do it slightly more advanced. Not much, mind you.
By using Guides instead, we get a couple of advantages:
- We can place a vanishing point outside of the canvas (something that is needed fairly often in 2 and 3-point perspective)
- We can snap the cursor to the guides, making our drawings a bit more accurate.

To set up the guides, open the View-menu, and select "New Guide. In the dialog that opens, select Horizontal for a ..well.. horizontal line (like the horizon), and vertical for a vertical line. (and yes, that was stating the obvious, I know...)
Anyway, when we have created our guide, we can move it by simply clicking and dragging.
When we have done placing our different guides (I would suggest at least two. One horizontal for the horizon, and one vertical to mark the Vanishing Point for a 1 point perspective. More for a 2 or 3-point perspective).
 |
| Vanishing point outside of canvas |
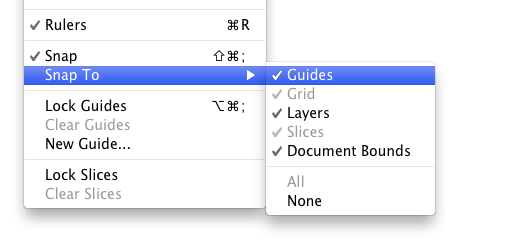
To make our drawing a bit more accurate, I would suggest that Snapping is activated. This way, we are sure that we always hit the vanishing point exactly (see image above). If we need to measure things, I would also suggest activating the rulers, since we sometimes has to split things in half (although there are other ways to do that)
With those things set in place, it's time to start drawing. More on that in a little while.
No comments:
Post a Comment